Product » A free email server for Windows and Linux » Knowledge Base
Document information
| Document ID: | 5168 |
|---|---|
| Subject: | Filtering spam/junk emails for Zimbra |
| Creation date: | 10/24/17 11:53 AM |
| Last modified on: | 5/19/22 10:00 AM |
Filtering Spam/Junk emails for Zimbra
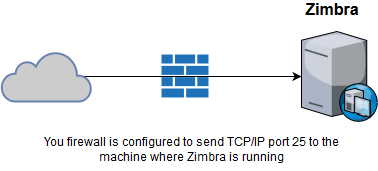
Using Xeams in front of Zimbra to filter junk/spam has many benefits. Moreover, it is straightforward to configure Xeams to filter messages before they hit your Zimbra server. This page talks about how to integrate Xeams with Zimbra. The following before and after image describes the network diagram explaining the design.Before

After

Installation & Configuration
We recommend you install Xeams on a different machine than where Zimbra is running. Although Xeams and Zimbra can share one computer, installing them on separate machines keeps matters simpleFollowing assumptions are made for this example.
- Zimbra is installed on 192.168.1.10
- Xeams will be installed on 192.168.1.20
- Your local domain name is
mycorp.com - You will be installing Xeams on Windows, Zimbra is running on an Ubuntu 14.4 server
Steps - Initial Setup Wizard
- Download
setup.exefrom here and run the installer. A browser screen will open up at the end. - Using a small wizard-like screen, configure Xeams to run as Stand-alone. Don't worry, we will change this setting later to it correct value.
- Specify one domain name that is considered local in Zimbra. Skip entering additional domains. We will configure the rest later on.
- Finish the setup wizard
- Click the link for Server Configuration and switch the server type to Firewall mode
Steps - LDAP Configuration
This is an optional, but recommended step
- Click Active Directory Integration under Server Configuration
- Check every check box on that screen and click Save
- Click Add Directory with Zimbra selected in the combo box next to the button
- Enter the following values:
- Friendly Name: Any name. For example, Zimbra
- Host Name/IP: 192.168.1.10 - Change this to match the actual IP
- Base DN: Put your email domain name here. For example, mycorp.com. When saved, Xeams will fix it to match the correct syntax.
- Admin User ID: User Account
- Password: Password for the admin account
Steps - Setup Domains
- Click SMTP Configuration under Server Configuration and select the Domain tab
- Enter a domain name, put the IP address of Zimbra in the Forwarded To field and select Zimbra for Active Directory
- Repeat this process for other domains you own
Steps - Creating users
There are several methods for creating users in Xeams. The following steps demonstrate how to create users using Zimbra LDAP. Click here for other methods.- Click Active Directory Integration under Server Configuration
- Click the user icon ( ) next the Zimbra
- Follow instructions on the page to create users
Testing Connectivity
Before going live, use the following steps to test if the setup is working fine.- Download a small utility called Email Sender from here and extract the files in the installation folder of Xeams, which is C:\Xeams by default.
- Start Email Sender, specify a valid email address in Zimbra and set the SMTP server value to Xeams (localhost if you are on the same machine). Do NOT specify anything for user id/password.
- Open Live Monitor in Xeams and hit the Send button in Email Sender. You should see this message go through Xeams and all the way to your inbox in Zimbra
Going Live
Once satisfied with a few test messages, configure your firewall to send inbound traffic for port 25 to the machine where Xeams is installed. That value in our example is 192.168.1.20.Send a few messages from outside and watch them getting processed in Live Monitor.
Configuring Outbound Emails
It is very important to let Xeams filter/process outbound emails. Not only Xeams will learn from what goes out, it can generate security alerts if unusual activity is detected. For example, it can let the administrator know if too many emails are being sent out from an individual user. Additionally, Xeams will send alerts if an outbound forgery is detected.Steps - Preparing Zimbra to send outbound emails through Xeams
- Go to Whitelisted IP Addresses under Filter Management, IP Filters. Add the IP address of your Zimbra server.
- Go to SMTP Server Configuration and select the Relaying tab. Add Zimbra's IP address in this list as well
- Finally, go to Auto-Learn Sender Filter under Filter Management, Adaptive Filters. Click the button for Manage Trusted IP Addresses and add Zimbra's IP in this list
- Now your Xeams is ready to accept emails from Zimbra. Next, you need to configure Zimbra to forward outbound emails to Xeams.
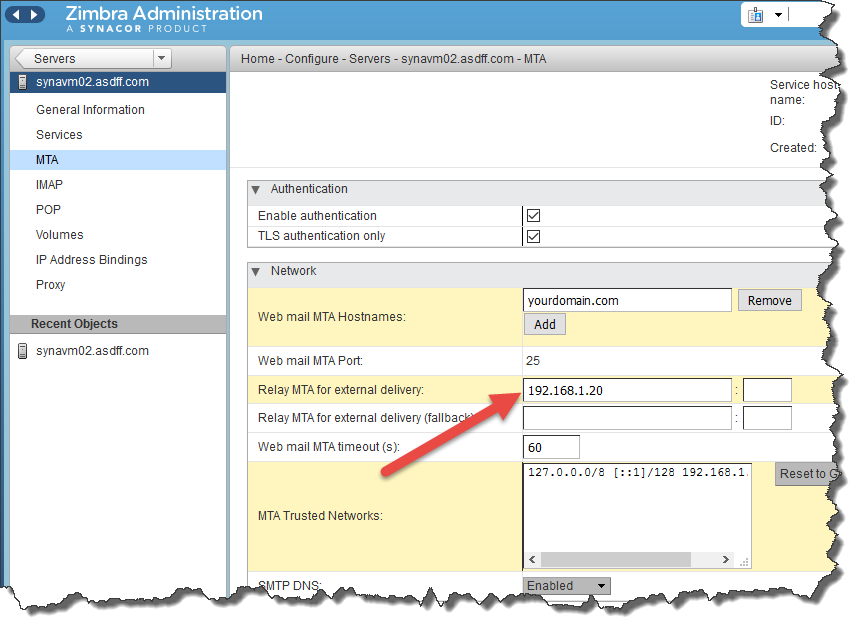
- Connect to Zimbra's web interface as "admin" and go to Home, Configure, Servers and click Edit
- Select the node for MTA on the left and specify the IP address of Xeams in the Relay MTA for external delivery field.
- Click Save. Following image shows a screenshot taken from Zimbra's web interface.

Add a comment to this document
Do you have a helpful tip related to this document that you'd like to share with other users?
Important: This area is reserved for useful tips. Therefore, do not post questions here. Instead, use our public forums to post questions.
