
Using OAuth 2.0 with Google Workspace/Gmail for sending outbound emails
Sending emails from devices and application servers has recently become challenging because many SMTP servers require you to use OAuth 2.0, but legacy devices and applications cannot use this mechanism. You can use Xeams to bridge this gap. This page discusses configuring your devices/application servers to send emails to Xeams, which will then deliver those messages through your Google Workspace account.
Use Case
Consider the following scenario:
- You have an application server or a device, such as a printer, that generates emails. Assume the sender of this email is accounting@yourcompany.com, and the recipient is client@yahoo.com.
- You're using Google Workspace to host your domain.
- This app runs on a network that is either behind a dynamic IP address or has outbound port 25 blocked, forcing you to send your emails through Google's SMTP server.
Watch a video demonstrating how to use OAuth 2.0 with Google.
Solution
Use the following solution to route such emails:
- Install Xeams inside the same LAN where your application server/device is located.
- Configure your application server/devices to send outbound emails to Xeams. This can be done without authentication since both Xeams and the application server are inside a trusted network.
- Xeams can authenticate with Google's servers using OAuth 2.0 to deliver emails.
The following diagram shows the flow.

Prerequisites
You must complete the following tasks before proceeding:
- Downloaded and installed Xeams.
- Have an account on Google Workspace.
- Understand how to configure your application server/devices to send emails to your local Xeams.
Device/App Server Configuration
Most devices and application servers accept values for SMTP servers when they need to send outbound emails. If your device and Xeams are running on the same network, you can use the local IP address or hostname of the machine running Xeams for the SMTP server.
If needed, you can create users in Xeams and then specify those users for SMTP Authentication. Alternatively, you can allow certain IP addresses in Xeams to relay.
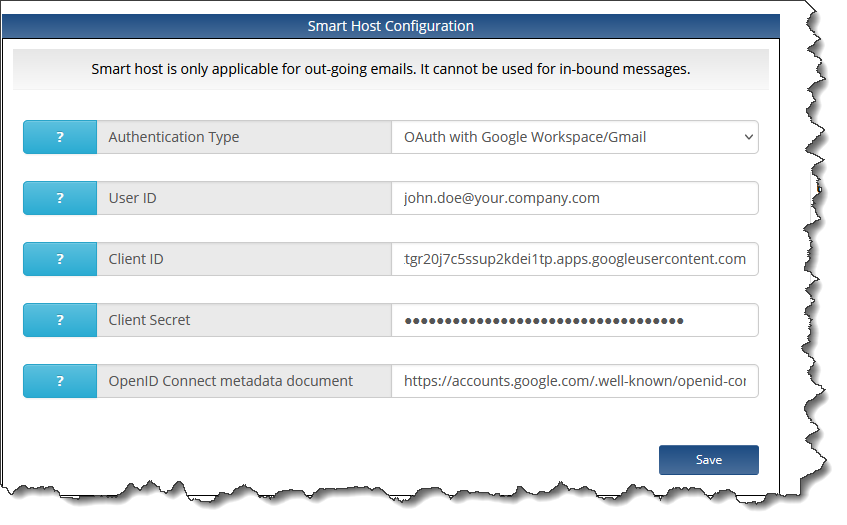
Xeams Configuration
You must configure the Smart Host (under Server Configuration) to route messages through Google Workspace. During configuration, you will be prompted for three parameters:
- User ID
- Client ID
- Client Secret
The remainder of this document talks about steps you need to take to get the values for these parameters.
Creating Project in Google
The User ID above refers to any valid user in your company, with an email that is hosted on Google Workspace. Values for the remaining two configuration parameters mentioned above are obtained by creating a project in Google Cloud. The following section discusses step-by-step instructions on how to achieve this goal.
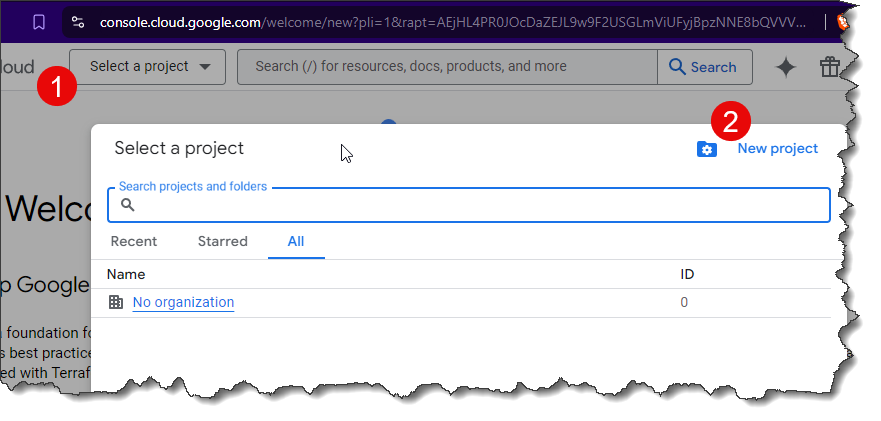
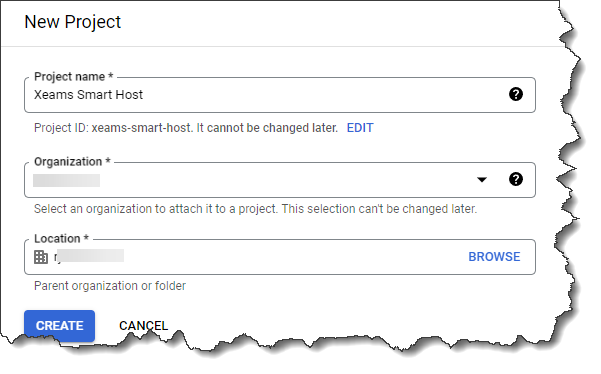
Give your project a new, such as Xeams Smart Host, as show below.
Note
You will need the Project Creator role for you account in order to create a project. Go to IAM & Admin/AIM and give your account the Project Creator role.- Go to https://console.cloud.google.com/ and click API & Services under Quick Access. Ensure your new project is selected in the selection box on the upper left-hand corner.
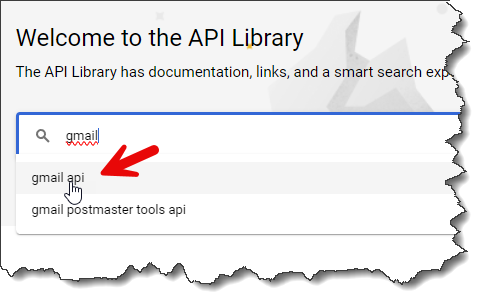
- Go to API Library and add gmail api as show below.
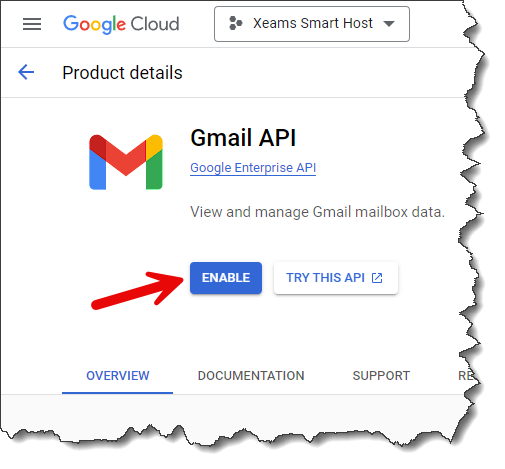
 If the search returns more than one results, select Gmail API. Click ENABLE on the following page, as shown below.
- Next, click OAuth consent screen, and select a User Type. Refer to the iamge below.
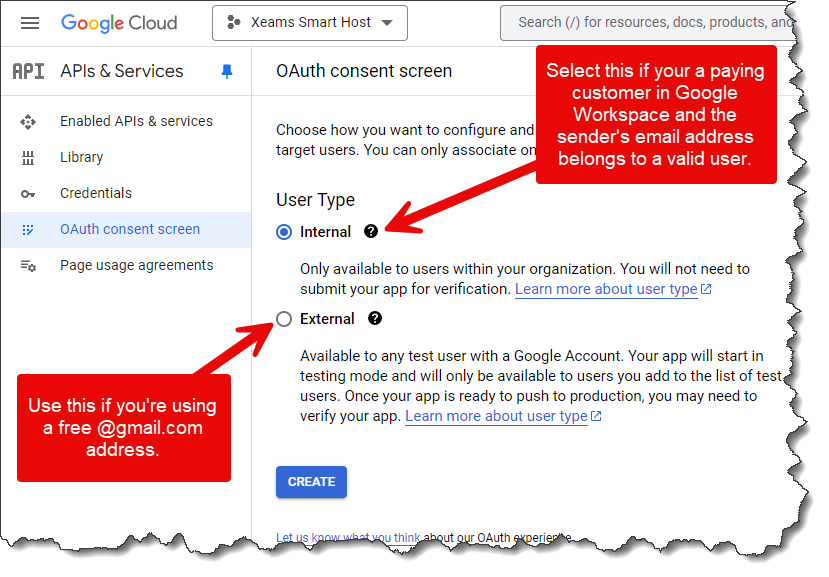
For this example, we assume you're a paying customer of Google and therefore, chosing the first option. - Assign values for the following fields on the next page:
- App name You can put any value, such as Xeams Smart Host.
- Specify an email for User support email.
- Specify the same email for Developer contact information.
- Leave the remaining fields blank and click SAVE AND CONTINUE.
- Click SAVE AND CONTINUE on the tab for Scopes.
- Click BACK TO DASHBOARD on the Summary page.
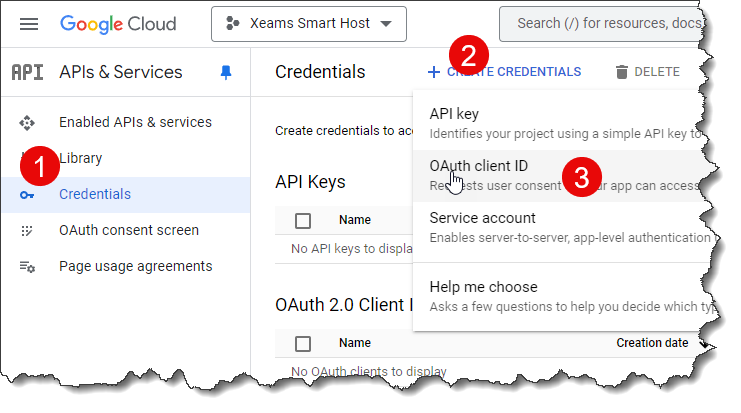
- Click the link for Credentials, and then CREATE CREDENTIALS on the top.
- Select OAuth client ID from the drop-down menu, as shown below.
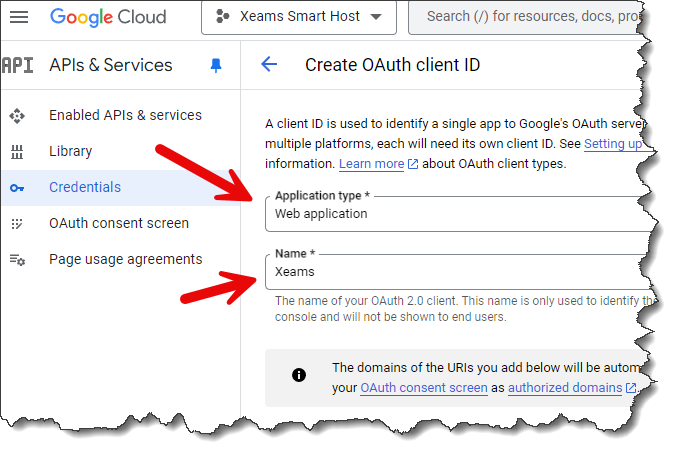
- Next, select Web application as the Application type, and give an arbitrary name, as shown below.
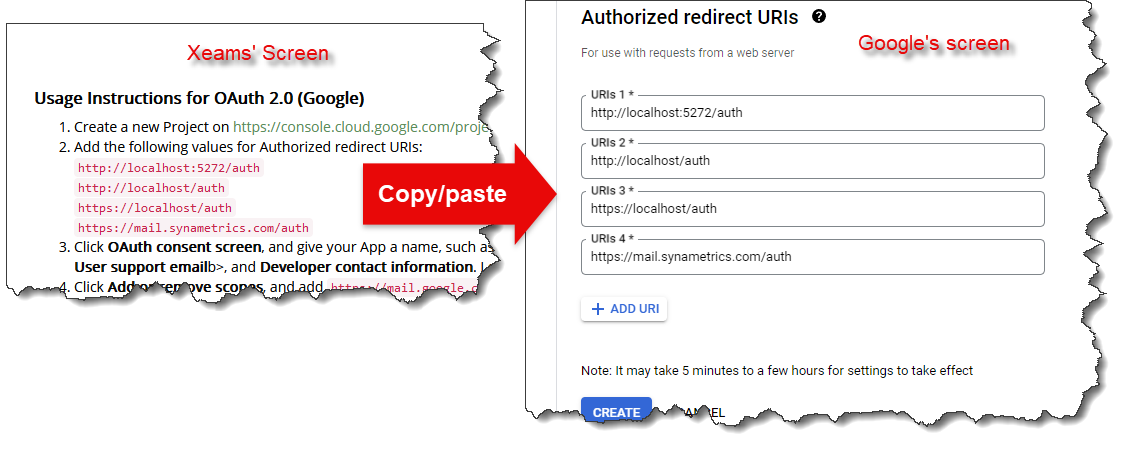
- Scroll down on the same page until you see a link for Authorized redirect URIs. You must add these URLs from Xeams' web interface.
Go to Server Configuration/Manage Smart Host, select OAuth with Google Workspace/Gmail. This will display the URLs on the right-hand side.
Copy/paste the URLs from Xeams into Google's configuration, as shown below.
- Click the CREATE button

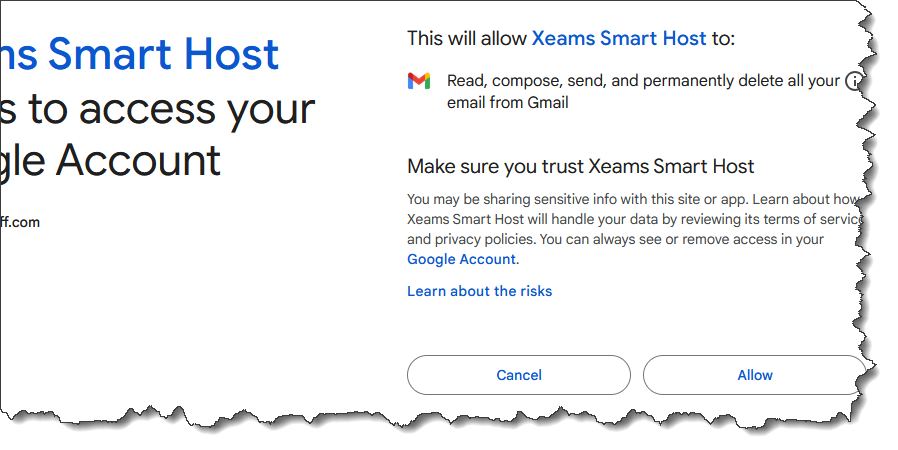 You will be ready to send emails to Google's
SMTP server from Xeams' smart host once this login is complete.
You will be ready to send emails to Google's
SMTP server from Xeams' smart host once this login is complete.
Notice that the User ID in the previous steps is set to John Doe's email. This means that John Doe must be the sender of every outbound email. If Jane Doe tries to send an email through this Smart Host, Google will replace sender's address to match John.
No further action is required if you are okay with this logic. To change this behavior, you must perform two additional steps:
- Configure the email settings in Google to allow Delegates. Refer to this page for instructions.
- Tell Jane Doe to add John as a delegate using the instructions on this page.