
Steps to run email server in 10 minutes
Follow these steps to run your own email server in 10 minutes.
Step 1: Domain Name
Get a domain name for yourself or your business. This can be done by visiting http://godaddy.com ( or another registrar of your choice). We will assume that your domain name is yourdomain.com.
Step 2: Static IP
Get a static IP address from your Internet Service Provider (ISP). Let us assume that the IP is 10.20.30.40 . By default your ISP will provide you with a dynamic IP address. It is a common practice to run email serves on a static IP address. Other servers on the Internet may consider your message junk if it comes from a dynamic IP address.
Step 3: DNS Configuration
Configure the DNS server on GoDaddy. You will need at least two records: An "A" record and an "MX" record.
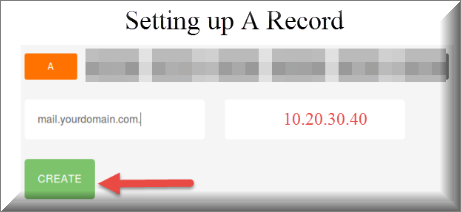
First, create an "A" record for mail.yourdomain.com, which should point to 10.20.30.40
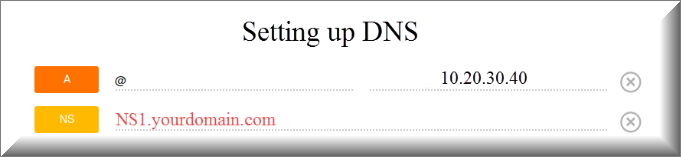
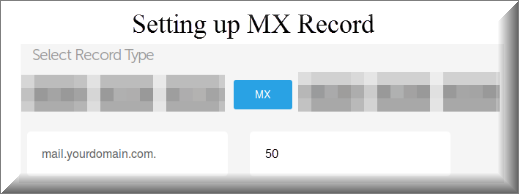
Next, create an MX record so other email servers know where to send messages for yourdoman.com and assign the priroty level. If you have more than 1 MX record, remember to set the priority level accordingly. Remember the lower the priority number, the higher the preference.
Step 4: Firewall Configuration
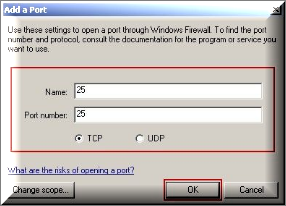
Emails are sent and received on TCP/IP port 25. Therefore, you will have to route traffic for port TCP/25 from your network firewall to the machine where you want to install an email server.
Typically, there are two firewalls: locally on the machine where the email server is running AND a router sitting at the edge of your network.
Windows Firewall
-
Open Windows "Control Panel => Security Center => Windows Firewall";
-
Select "Exceptions" tab;.
-
Click "Add Port" button to add 25 TCP port.
Router (using Linksys Router)
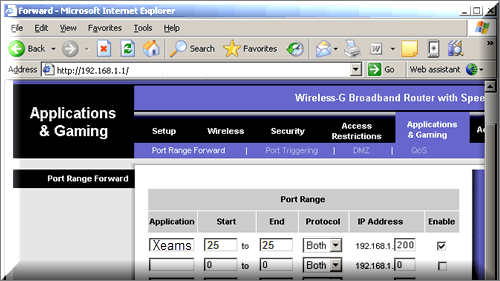
Normally router's internal IP address is 192.168.1.1. Every router is different and therefore, you must refer to the documentation of your router to configure it. For the sake of argument, we are using Linksys Router. We will also assume the computer where email server is running has an IP address of 192.168.1.200.
-
Login router/NAT's control panel, normally is "http://192.168.1.1".
-
Go to "Port Forwarding" function (different router/NAT may have different function layout).
-
Create port 25 port forwarding with 192.168.1.200 and save changes.
Step 5: Installation of Xeams
Install Xeams from http://xeams.com/XeamsDownload.htm choose the appropriate installer (Windows, Linux, MacOSx, Virtual Machine, Unix and BSD) and follow the installation instructions outlined.
Let's assume you are using Microsoft Windows as the operating system. Therefore, you should download setup.exe file from Xeams' website.
Installation steps:
-
Double click setup.exe
-
Towards the end of the setup, a browser window containing a web page will open. This is called the "Admin Console" for Xeams.
-
Follow instructions on this site to complete the process
Step 6: Testing communication
The best way to test if Xeams is working correctly is to send and receive an email from the Internet.
Testing Inbound
-
Try sending an email from outside your network, such as GMail, Yahoo Mail or Hotmail
-
You should be see that email in your inbox. In case you do not see the message refer to this document.
Testing Outbound
-
Use an email client such as MS Outlook or Mozilla Thunderbird to send an email to an address on the Internet.
-
Ensure the SMTP server in your email client is set to Xeams server.
-
For common problems related to outbound emails refer to this document.
In both of the above cases, you should be able to watch emails as they arrive, as well as outgoing messages using "Live Monitor" feature in Xeams.
| Created on: | Jan 5, 2017 |
| Last updated on: | Apr 17, 2024 |